


How do I install a golf screen for my golf simulator?
Aug 3rd 2023
How do I install a golf screen for my golf simulator?
Now that you have made the decision to install a golf screen , lets review the best options on how ti install your screen. The 2 basic ways to install a golf screen is to build a golf cage or hang the screen. We are not going to get into some of the more obscure ways to install a screen with tiny bungees, angled irons, wood mounted wall frames, etc.
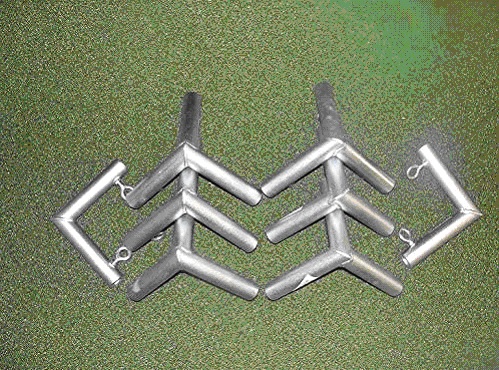
Lets start with the basic golf cage and review our unique sleeve system
1) BASIC 3/4
-1"
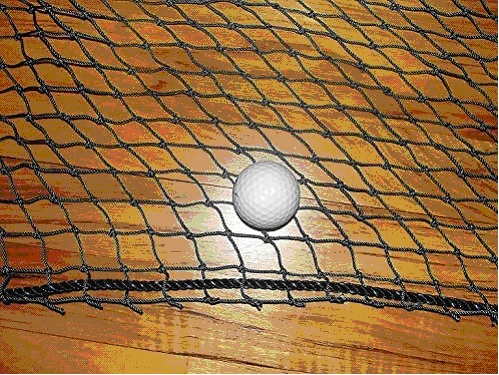
Once the golf frame is built, a 4 sided net is installed that covers the back, top and sides. The golf net is all 1 piece, so no balls can get through it at any point. The netting is 1" squared and has a rope border. It is attached with ball bungees.
Typical sizes of the cage are:
10 x 10 x 5
10 x 10 x 10
10 x 12 x 5
10 x 12 x 10
10 x 15 x 5
10 x 15 x 10
The 10 ft deep cages allow the golfer to hit inside the cage, so any missed shots will stay inside the cage .
CLICK HERE TO
FIND OUT MORE ABOUT SPECTRUM
Now is time to install the golf screen.
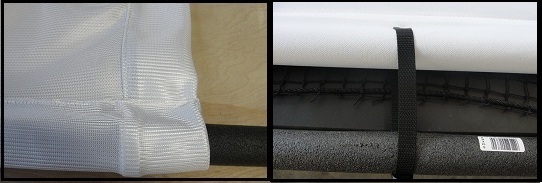
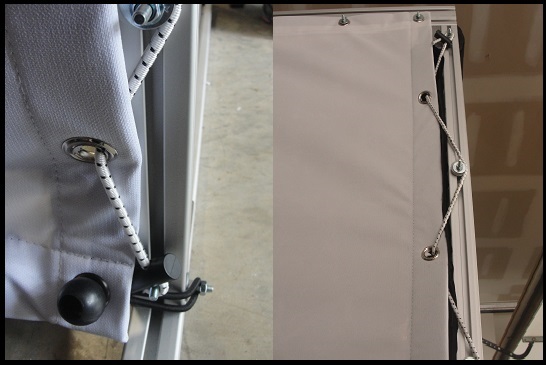
The screen goes in front of the net and attached to the sides of the cage with 3/4 adjustable straps. We use a unique system to install the golf screen to the cage. We sew a 3" sleeve into all 4 sides of the screen. We then slide a PVC pipe into the sleeve. The pipe creates a nice smooth edge and takes the pressure off of the material when you install the straps. All the tension is on the pvc and not the fabric. There are slits on the screen that the 3/4 strap slides thru and attaches to the frame. The straps are completely adjustable and can be tightened or loosened. The golf screen is 12" small than the cage. For instance, a 10 x 10 x 10 cage would have a 9 x 9 screen. This leaves a border for the screen to be pulled tight.
Options included:
Screen pads
Blackout panels
Floor pads
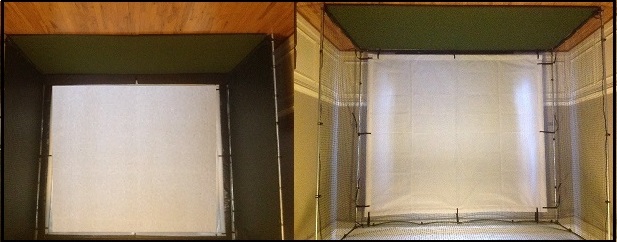
The advantage of this method of install a golf screen is simple design, ease of assembly and low cost. Disadvantages are smaller screen in relationship to golf cage and not a very clean look with all the ball bungees.
In the next article,
HOW TO MAKE A
2) INSTALL YOUR
SCREEN WITH GROMMETS
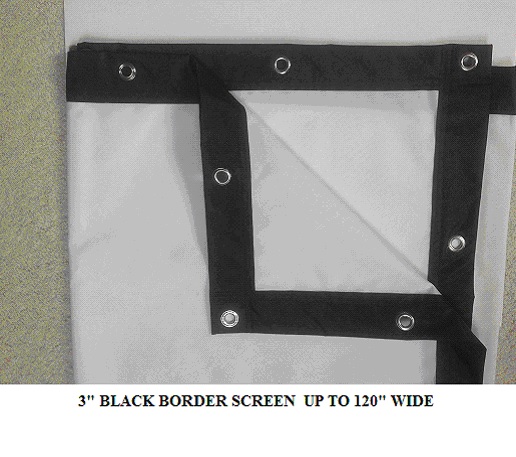
Using metal grommets and elastic ball bungees is the most popular way to install a golf screen. Most of the major screen manufacturers use this method. The screen is typically 8-12" smaller than the frame . That leaves a border to pull the screen tight . The ball bungees slides thru the grommet on the screen and wraps around the frame to pull it tight. This method has some disadvantages . 1) No matter how thick your screen material is, grommets will eventually tear off. 2) There is no adjustability with ball bungee and 3) if the grommets are spaced too far apart, it can create waves in the edges of the screen and too much tension on the grommets.
If you do use grommets, make sure you have plenty of them installed on your screen ( 12" OC )and that the ball bungees are not stretched too tight.
3) HOW DO YOU HANG
A
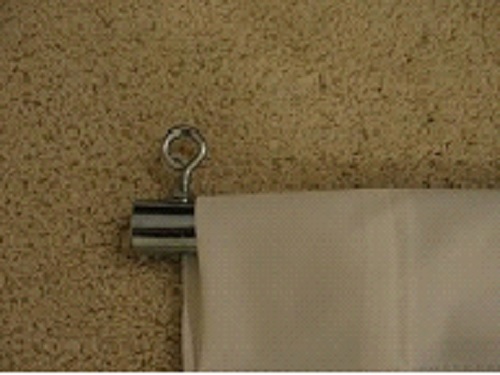
If you want something that is retractable and can be put up and taken down easily, a hanging golf screen might be the answer. We designed a hanging screen with a couple of different versions. Each screen has a 3" sleeve on top and bottom. Hemmed on sides.
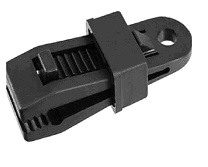
The top sleeve can hold a 3/4-1" metal pipe , with a special endcap on the end with a eyelet screw. The endcap just slides on to the end . Take a -hook lag screw into ceiling joist and run a chain to the eyelet and both ends. For the bottom, you can use another pipe to weight it down and attach to the floor or just let the bottom drape on the floor. We have a formula to help you choose the right screen height. We can sewn in straps on the sides or use tarp clips on sides. You can build a vertical frame on the sides to attach to
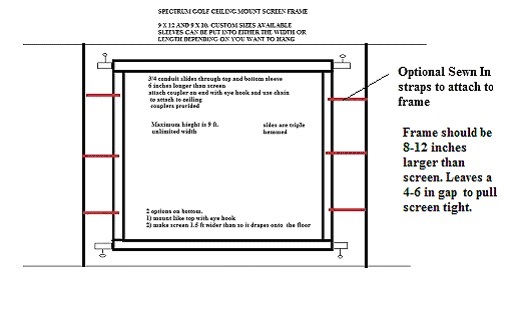
The issue with a hanging screen is its hard to install top/sides ( since there is no frame ), and if you do not have any support on the sides of the screen, you will get some waves and wrinkles. Also its hard to install a back panel or net.
There are some retractable nets like the sports screen that has a motorized roller. We make screens for these that just velcro on to the net.
OTHER WAYS TO
INSTALL A
We are able to do sleeves, velcro, grommets, sewn in straps, sewn in flaps with velcro and just about anything else that can attach a golf screen. We have made replacement screens for just about all of the major golf simulators. If you can draw it up, we can make it. Emails us your plans at OPTISHOTGOLFSIMULATOR@GMAIL.COM
CLICK HERE TO
FIND OUT MORE ABOUT SPECTRUM
OTHER TYPES OF
In addition to our standard 4 sleeve screen and hanging screen ,we also make a notched screen. This screen has 3.5" notches on each corner and the 3" sleeves go all the way thru each side. It uses the same pvc pipe and adjustable strap as our standard golf screen. The notched screen was designed to wrap around a 12-14" deep frame and attach to the back part of the frame. This way you can build the frame the same size as the viewing area of the golf screen. Of course, this screen can be used in a simple 4 sided golf frame as well.
FINAL THOUGHTS
With over 12 years experience in the golf screen business, we can make just about any type of golf screen. If you have an idea and can put it on paper, email it to us at OPTISHOTGOLFSIMULATOR@GMAIL.COM.
